Backup and Restore Center has been re-furnished with new additions and ease of access on Windows 7. Backup and Restore allows to create a system image, which is an exact image of a drive. The system image includes Windows and system settings, programs, and files.
The system image can be used to restore the contents of computer if hard drive or computer ever stops working. It provides complete restoration, so we can’t choose individual items to restore, and all of current programs, system settings, and files are replaced. Beside it, we can manually include additional data drives.
How To:
Here is the step by step tutorial to create the system image:
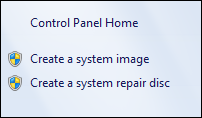
1. Open Control Panel > System and Security > Backup and Restore and choose Create a system image from left pane.

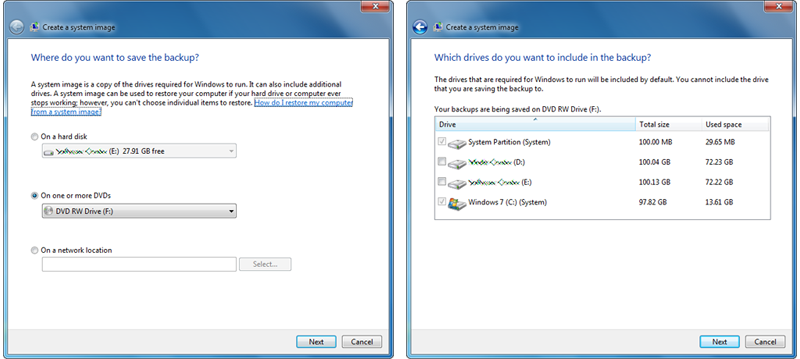
2. It launches a wizard and searches for backup devices, then offer to choose the device. In this article, we are taking backup on DVDs, you can backup on hard disk and network location as well.

3. On next step, you will see that Windows and System drives are automatically selected. Here you can select additional drives. Click on Next, The wizard scans total space required to backup selected drives and confirm the backup settings.
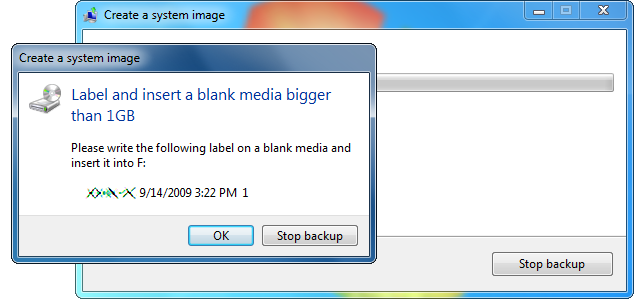
4. After Click on Next, The backup process will be started and ask to insert blank media one by one as per requirement. The process will format DVD and burn the system image by splitting it in appropriate size.

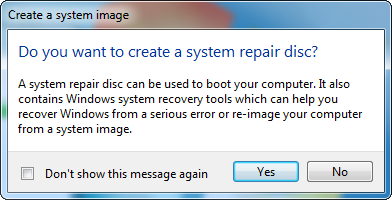
5. Done it! After completion of backup process, you need to create a System Repair Disc.

The system repair disc is the bootable disc and contains Windows system recovery tools which helps to recover Windows from serious error or re-image your computer from a system image.
Applies To:
- Windows 7 Ultimate
- Windows 7 Enterprise
- Windows 7 Professional
- Windows 7 Home Premium
- Windows 7 Home Basic
- Windows 7 Starter
Leave a Reply